

Mold-Resistant Silicone Sealant Company Reveals the Secret to a Mold-Free Bathroom
2026-11-03
A mold-free bathroom isn’t luck—it’s chemistry. Most silicone sealants claim protection but quietly feed the very spores they’re supposed to block, turning fresh caulk into a blackened mess within months. That’s why Baolongda Group took a different route: re-engineering the sealant from the molecule up so mold can’t take root. In this post, we pull back the curtain on what actually causes bathroom mold, why standard silicones fail, and the anti-fungal formula that keeps joints clean for years—not weeks.
The Overlooked Corner Where Mold Takes Root First
Run a finger along the seam where your bathroom vanity meets the wall, just behind the faucet. That narrow strip, rarely wiped down and often shadowed by towels, is a prime landing spot for mold spores. The combination of splash-back from daily hand washing, trapped humidity, and a near-zero airflow keeps the surface damp for hours. It doesn't take long before a faint gray fuzz appears along the caulk line—easy to miss unless you're kneeling down to retrieve a dropped bottle of soap.
Another spot that gets a head start is the underside of the kitchen sink's rubber gasket, especially where the disposal connects. Food particles and warm rinse water create a sticky film that holds moisture against the rubber. Since most people only glance at the visible basin, the hidden lip stays wet and undisturbed. Within a week or two, black speckles can bloom there, spreading into the hinge of the cabinet door below if left unchecked.
Window tracks in bedrooms or living rooms deserve a closer look too. Condensation from temperature swings overnight runs down the glass and pools in the aluminum grooves. Dust, pollen, and dead insects settle into that narrow trough, giving mold both food and water. Because the track is out of the direct line of sight, it often gets skipped during routine cleaning. By the time you notice a musty odor near the sill, the colony has usually worked its way into the rubber weather stripping.
Why Ordinary Caulk Turns into a Mold Buffet
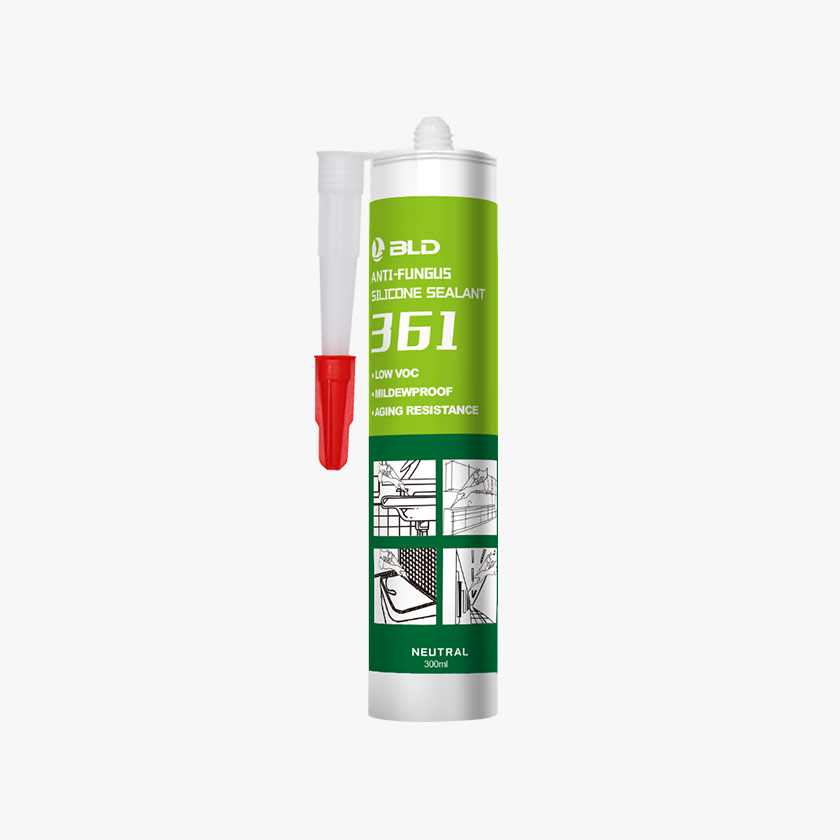
Most basic caulks are essentially porous sponges once cured. Microscopic air pockets and tiny surface imperfections trap moisture from steamy showers or kitchen splashes, giving mold spores exactly what they crave: a damp, dark hideout that never fully dries. On top of that, many standard formulas contain organic compounds—things like latex or acrylic binders—that serve as an accidental food source for hungry spores.
Without any built-in antimicrobial protection, a plain bead of caulk becomes an all-you-can-eat buffet. The warm, humid air in bathrooms and around sinks constantly replenishes the moisture supply, while soap scum and skin cells settle into the caulk's texture, adding extra nutrients. Within weeks, stubborn black or pink staining can take hold, turning a clean seam into a visible breeding ground.
The real kicker is that surface cleaning rarely reaches the spores hiding beneath the caulk's skin. Bleach sprays might lighten the stain for a day, but as long as the material stays porous and damp underneath, the mold simply regrows. Upgrading to a caulk specifically formulated with mildew-resistant additives breaks this cycle by denying mold both the moisture retention and the organic meal it depends on.
What Makes Silicone Truly Mold-Resistant Beyond the Label
Silicone earns its mold-resistant reputation because it is dense, non-porous, and hydrophobic. Water beads on the surface instead of soaking in, and the material itself offers no organic nutrients for spores to feed on. That is a genuine advantage over rubber or plastic, which often develop micro-cracks where moisture and debris collect.
However, the label only tells part of the story. In real kitchens and bathrooms, mold rarely grows on the silicone itself. It grows on the thin layer of soap scum, body oil, or food residue that settles on top. Lower-grade silicone blended with plasticizers can also lose its integrity over time, creating tiny pits that trap moisture. So the real difference comes down to formulation and maintenance: a high-quality, platinum-cured silicone that gets wiped down regularly will stay clean far longer than a cheap blend left under standing water.
The Right Way to Prep So Sealant Actually Holds
Most sealant failures happen long before the tube is opened. The real work is in the prep, and skipping it is how you end up redoing the job a month later. Start by stripping away every trace of old caulk, soap scum, or loose debris. A razor scraper works for flat surfaces, but don't ignore the corners where residue hides. Wipe the area down with mineral spirits or denatured alcohol, then let it dry completely. If the surface feels even slightly damp, the sealant won't grab.
For porous materials like concrete, wood, or unglazed tile, a quick solvent wipe isn't enough. These surfaces drink up moisture and release it slowly, which can ruin adhesion. Give them a day to air out after cleaning, or hit them with a heat gun on low to drive out trapped dampness. Then run a strip of painter's tape along both edges of the joint. This gives you a crisp line and keeps the sealant from smearing where you don't want it. Press the tape down firmly, especially at the ends.
Finally, check the gap itself. If it's wider than half an inch or deeper than it is wide, stuff in a foam backer rod before caulking. The rod creates the right depth-to-width ratio, so the sealant can flex instead of tearing away from the sides. Apply steady pressure as you lay the bead, then tool it with a gloved finger dipped in soapy water. Remove the tape immediately, before the skin forms. That's the difference between a seal that stays put and one that peels off in sheets.
Bathroom Habits That Starve Mold Before It Starts
Most mold problems in the bathroom trace back to one simple habit: letting moisture linger. If you wipe down the shower walls and tub edges with a microfiber cloth or a small squeegee right after your last rinse, you remove the standing water that mold spores need to germinate. It only adds thirty seconds to your routine, but it cuts the available moisture dramatically, especially in corners and along caulk lines where water tends to pool.
Ventilation isn't just about flipping on the exhaust fan while you shower. Keep the fan running for at least fifteen to twenty minutes after you've turned off the water, and crack a window if the weather allows. This pulls humid air out before it can condense on cooler surfaces like mirrors, ceiling paint, and the back of the toilet tank. If your fan sounds weak or the mirror stays fogged long after your shower, it's probably not moving enough air—cleaning the vent grille or upgrading the fan can make a bigger difference than most people expect.
Another habit that quietly starves mold is keeping the bathroom as dry as possible between uses. Hang towels so they can dry fully instead of bunching them on a hook, and wash bath mats before they start smelling musty. Fix even slow drips from the sink or tub faucet, because a constant trickle feeds mold behind fixtures and under the floor. And if you store shampoo bottles or cleaning supplies directly on the shower floor or in a damp corner, move them to a basket or shelf—those little puddles underneath are exactly where mold gets its first foothold.
When Scrubbing Stops Working and Re-Sealing Becomes the Only Fix
Sometimes no amount of elbow grease can revive a tired surface. You scrub, you rinse, you repeat—and still the stain sits there, settled deep into pores that have lost their original barrier. That's when it becomes clear the protective seal has failed. Grout, stone, and even some woods rely on a thin layer of sealant to block moisture, oils, and grime. Once that layer wears away or cracks, cleaning only pushes dirt further in. The result is a surface that looks dull even when wet, and feels rough or sticky no matter what product you throw at it.
Re-sealing is not just an extra step—it's often the only real fix. A fresh seal restores that invisible shield, but timing and preparation matter. First, the surface must be bone-dry and stripped of any old residue. Applying a new sealer over trapped moisture or leftover cleaner can lock in problems instead of solving them. Choose a sealer matched to the material: penetrating sealers for porous stone, film-forming types for high-traffic tile. The difference after a proper re-seal is immediate: water beads up again, colors deepen, and routine wiping actually works. What felt like a lost cause becomes low-maintenance once more.
Ignoring the need to re-seal often leads to bigger damage. Cracks widen, mildew takes root in hidden gaps, and scrubbing becomes a weekly battle that never ends well. Professionals often point to one telltale sign: if you can see a dark ring around edges or joints after cleaning, the substrate below is absorbing what the surface should have repelled. At that stage, no cleaner can reverse the process. Re-sealing stops the cycle—and gives you back the clean, sealed finish you thought was gone for good.
FAQ
A mold-resistant sealant includes additives that stop mold spores from settling and multiplying on the surface. Instead of just killing existing growth, the formula creates an environment where mold can't take hold in the first place, especially in persistently damp areas.
Start by scraping away all old sealant and cleaning the joint with rubbing alcohol. Let it dry completely, then apply the new sealant in one steady pass. Smooth it with a wet finger or tool within five minutes, and keep the area dry for at least 24 hours so it cures properly.
It handles the sealant lines, but mold can still grow on tile, grout, and shower curtains. The real secret is pairing the sealant with better airflow and wiping down wet surfaces. When you do that, the treated seams stay clean for years instead of months.
Focus on the bathtub rim, shower corners, sink backsplash, and any joint where water sits or splashes. Also check the base of the toilet and the gap between the vanity and wall — those hidden spots are often the first to turn black.
Most formulas remain effective for five to ten years if applied to a dry surface and cured fully. But if you notice it peeling, shrinking, or darkening deep under the surface, it's time to strip it out and redo the joint.
Applying new sealant over damp or soapy residue. Even a thin film of moisture prevents proper adhesion, and that's where mold sneaks in later. Another common error is using a cheap acrylic caulk labeled for kitchens and baths, which breaks down much faster than a true mold-resistant silicone.
Yes. Cut out every trace of the old bead with a razor scraper, then clean with a bleach solution or rubbing alcohol and let it dry completely. Fresh sealant cannot bond to old silicone, and covering mold just hides the problem while it spreads underneath.
Bleach only kills surface mold, but the roots remain in the sealant and feed on trapped moisture. Mold-resistant silicone prevents those roots from anchoring in the first place. If you keep getting regrowth in the same seam, the old sealant likely has microscopic channels where water and spores are hiding.
Conclusion
Most people scrub visible tile grout, but a mold-resistant silicone sealant company notes that the first colony usually starts where the tub lip disappears behind the wallboard or along the inner seam of a shower curb. These recessed gaps stay damp for hours after a shower, and regular acrylic or latex caulk becomes a feeding ground because its organic oils and porous surface hold moisture and soap residue. Once mold spores land there, they have both food and darkness. A true mold-resistant formula does more than carry a label: it uses a non-porous cured surface that repels water rather than absorbing it, and it contains biocides evenly distributed through the material, not just painted on the top. That even distribution is what keeps the protection from washing away after a few weeks of regular cleaning.
Before applying any sealant, the company recommends cutting out every trace of old caulk, drying the joint with forced air for at least 24 hours, and then wiping the seam with rubbing alcohol to remove soap film and body oil. Even the best silicone will peel away from a dirty or damp surface. Afterward, small habits matter more than harsh chemicals: squeegeeing the walls after the last shower, running the exhaust fan for 20 minutes, and leaving the shower door open cost nothing but keep the joint dry enough to starve mold. However, if black staining reappears underneath the bead or the silicone has become soft and crumbly, cleaning cannot reach the roots. At that point, removing the old material and re-sealing with a properly prepped joint is the only reliable fix, because surface scrubbing only masks the problem growing behind the sealant.
Contact Us
Contact Person: Charles
Email: [email protected]
Tel/WhatsApp: +86-0536-3350888
Website: https://www.baolongda.com/